
 Sometimes in life, you are just cruising along, thinking that everything is just fine and dandy. You haven’t a care in the world…until it hits you. You know that moment. That instantaneous feeling of self-loathing and general perturbation that strikes you like a load of bricks when you realize that you are an idiot. A complete frickin’ idiot.
I will fully admit, that I am more than well acquainted with this feeling. Such moments can be tough to take, because in said moments of complete cognizance, you are fully aware that you are not as bright as you previously thought you were. Or, to paraphrase one of my personal role models in life…one Lloyd Dobler…you suddenly know enough to know that you don’t know. And that’s something.
But here’s the good news. These moments of clarity provide us with a huge opportunity. Our newly achieved awareness presents a great challenge. We know of the problem…now what’s the solution?
This is the kind of challenge I wake up for every morning. The title listed on my business card for my 9-5 may say Communications Director…but it might as well say “Bad-Ass Problem Solver.”
Or to quote another one of my life role models…”If you got a problem, yo…I’ll solve it. Check out the hook while my DJ revolves it.”
That was a lie. Rob Van Winkle is not my role model. I’d drink a beer with the guy…and I might even let him remodel my garage…but that’s where I draw the line. I just thought it would be a funny thing to throw in there. Plus the lyric popped in my head as I was typing, and I just couldn’t fight the impulses surging from my brain down to my fingers. The next thing I knew…the words were just there.
Sally forth!
So back to my recent “D”oh” moment.
Since switching over to our new mash tun, I have noticed that we have been having some flow issues. The liquid has been filling up our grant faster than our beer pump could keep up and the inflow through our Thermal Interchange Manifold (TIM) has been fairly anemic. We made a few changes that helped, such as running hard pipe between the grant ant the pump, and re-positioning the TIM’s thermowell, but the flow was much weaker than it should have been. Certainly much less that what we would like.
Then it dawned on me. Our plumbing was simply too small.
I know that should seem like a fairly obvious revelation, but it wasn’t. Our pump has 1/2″ fittings. Our tubes are all 1/2″. Our hard lines are 1/2″. Our valves are all 1/2″. Our disconnects were all 1/2″…or were they.
 That was the moment.
Yes, our quick disconnects would fit inside a 1/2″ silicone tube…and were even marketed as 1/2″ fittings…but the orifice for the fittings was not 1/2″. In fact…when I took out a ruler and measured them, I found out that they were actually a smidge shy of 3/8.” A full 1/8″ smaller than the tube that connects to them.
An eighth of an inch may not sound like much, but I quickly came to realize from that point forth, that at our scale 1/8″ makes a very big difference in terms of fluid transfer.
Let me illustrate. Below is a handy chart that I made in excel to demonstrate the flow capacity of some of the most common pipe and tubing sizes used in home and small scale brewing. If you look at the Volume columns, you will clearly see that by using fittings with a 3/8″ opening (the .375 row for those who aren’t as quick as I with fraction to decimal conversions), we were essentially cutting our flow in half. 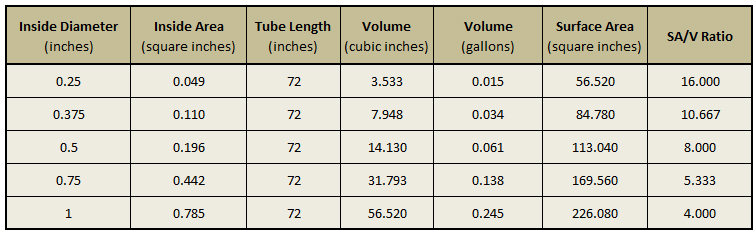
This may have worked when we were using a 10 gallon igloo cooler for our mash tun, with just a 3/8″ valve coming out of it, but when we bumped up to the bigger tun, and a 1/2″ valve, our system was doomed to not be able to keep up.
A further smack to the head is that we have been using these same disconnects for everything that connects to our pumps…inflow and outflow. We have been choking off our pumps, and have been doing so for two years. No wonder we are having issues now.
The answer was simple. We needed bigger fittings. So bigger fittings we got.
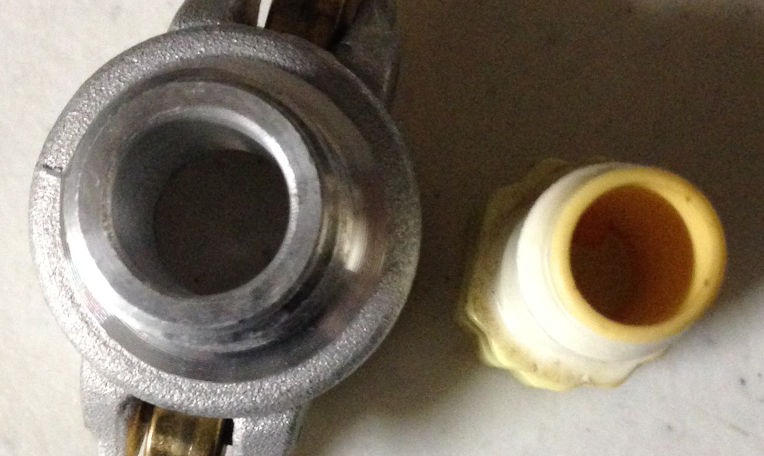
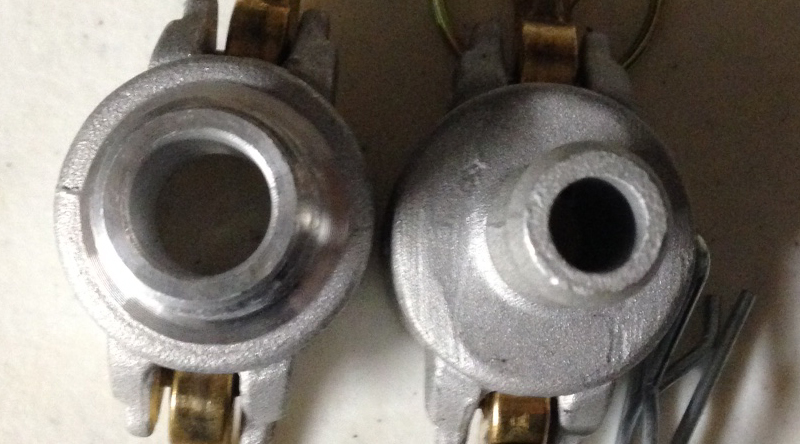
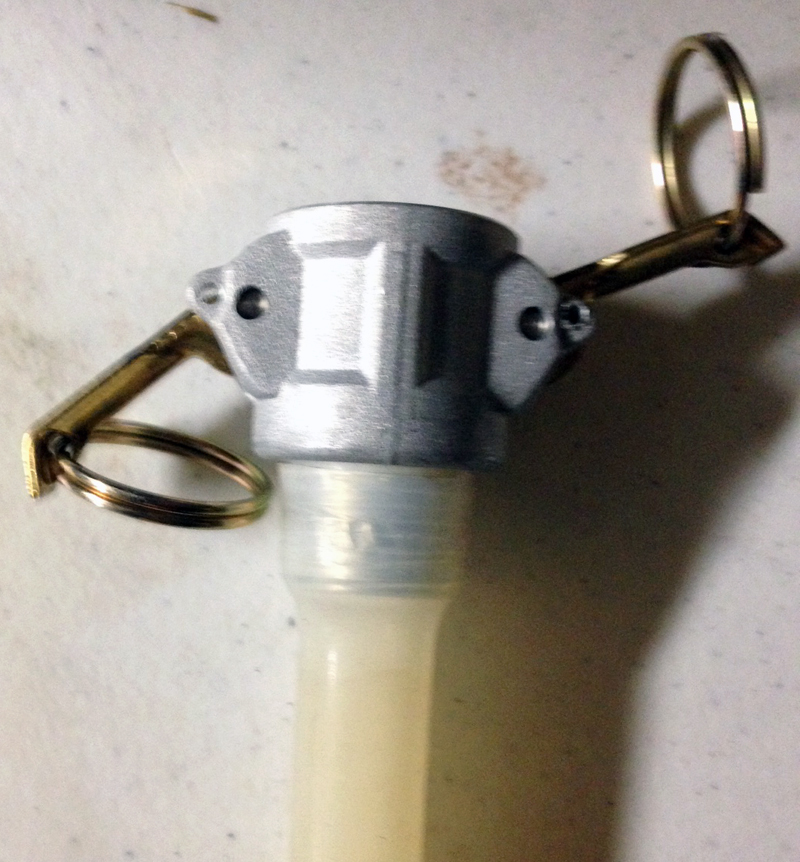
On the left is one of our new 1/2″ cam and groove fittings. On the right, one of our old Kent twist fittings. You can see the difference in diameter. Flow should no longer be an issue with these…unless you get the ones with a barbed hose connection. You can see such a camlock on the right in the pic below. As you can see, it too (despite being a 1/2″ disconnect…only has a 3/8″ orifice.
Instead of going with barbed connectors, we have opted to go with ones with 1/2″ MPT fittings.
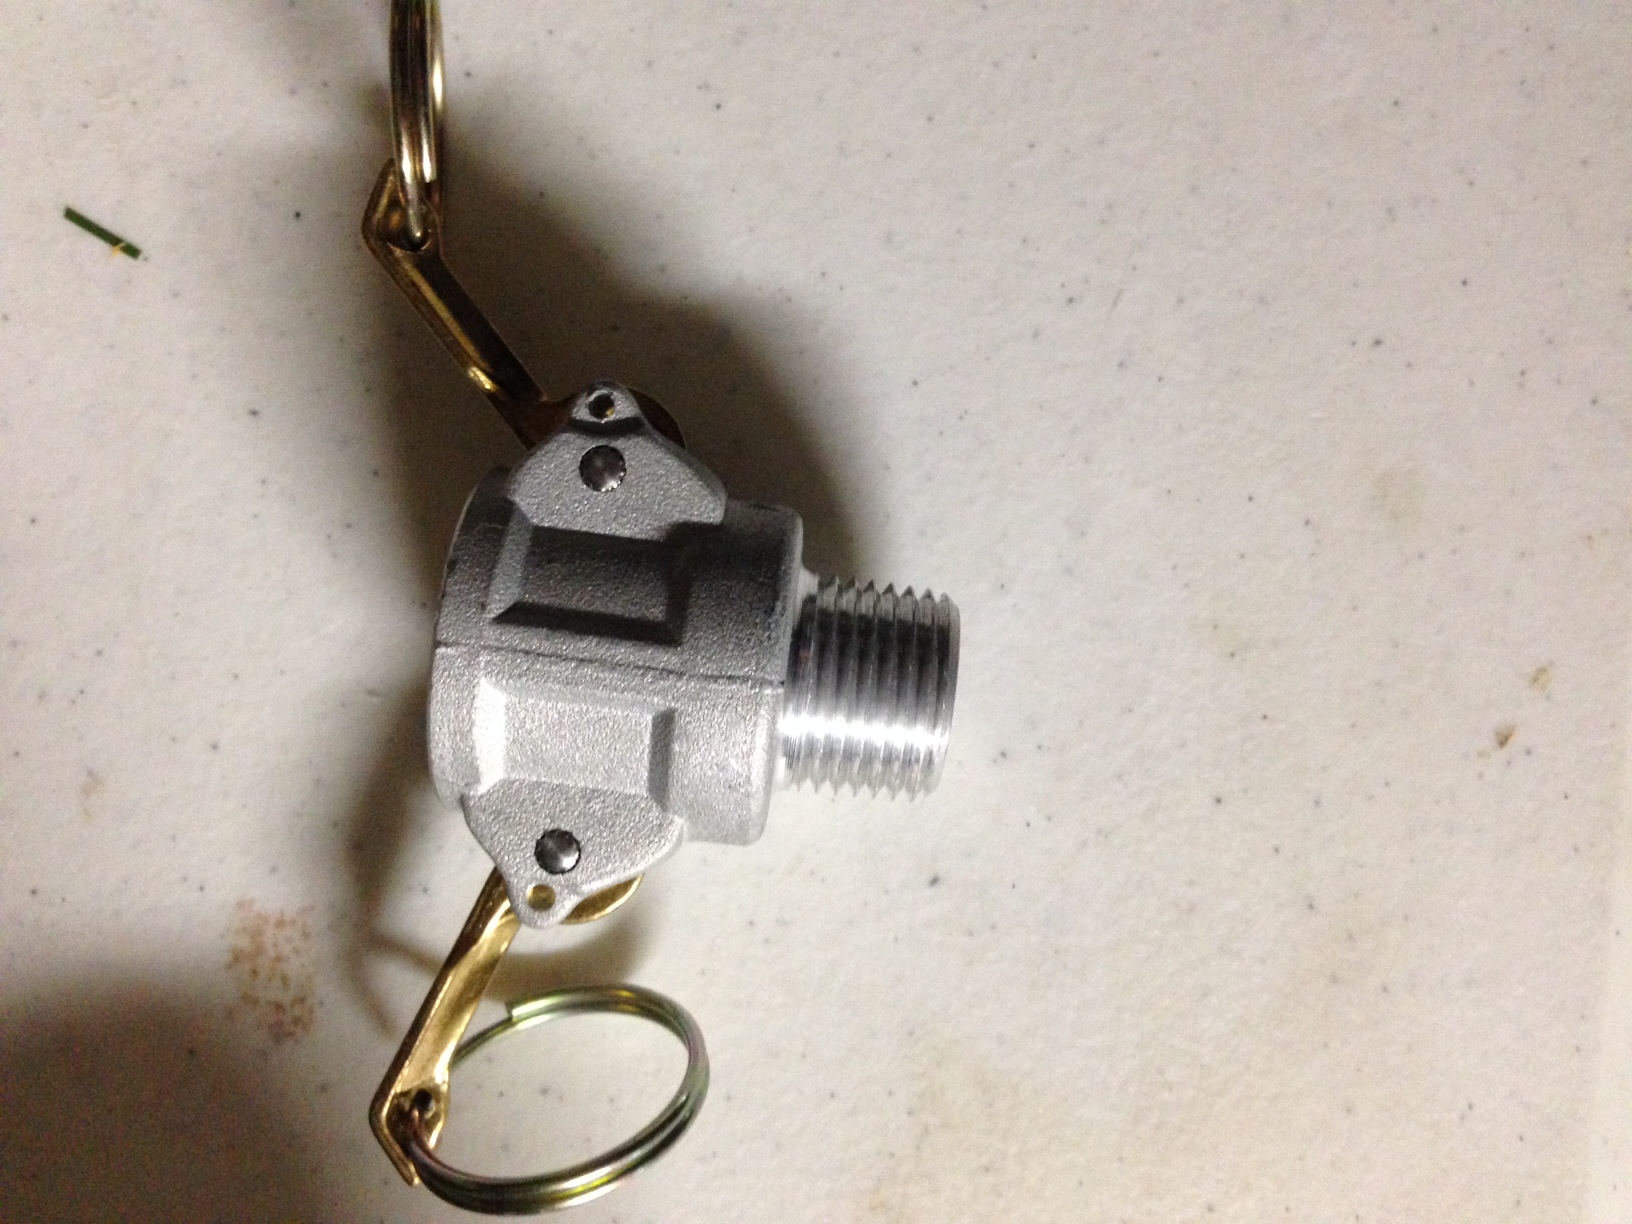
The outside diameter of these, when you account for the pipe thread, is almost 3/4″, so it took a bit of elbow grease to get our high-temp silicone tubing to fit, but fit they do…and quite snugly. So snugly, in fact, that hose clamps are probably unnecessary.
Of course, our disconnects were only one of the spots of flow restriction we had built into our brew house.
Another issue was with the heat exchanger we have been using as our HERMS coil inside our Hot Liquor Tank. While this 25 foot length of coiled 3/8″ ID stainless steel served us well in the past, it just won’t cut the mustard for this purpose going forward. It has been decommissioned and awaits re-purposing elsewhere in the brewery.
As a replacement, we cobbled together a new prototype heat exchanger. To explain our logic, let me reintroduce you to my chart from earlier in this post:
While 1/2″ tubing might be capable of delivering almost twice the volume that 3/8″ can, the increase in surface area it provides is much less. In fact, the ratio between surface area and volume is actually better for 3/8″ than 1/2″…and since surface area is really what matters most when it comes to transferring heat, we felt that 3/8″ tubing still had its advantages for this purpose. So how could we take advantage of the increased SA/V ratio without slowing down our flow?
The answer was ultimately a simple one. Double up our 3/8″ tubing.
So here’s what we did:
We started off with a single 25 foot roll of 3/8″ copper tubing. We cut it in half, and bent the two lengths around a corny keg to create two helixes. 12.5 feet of tubing may not sound like much, but we don’t need a massive temperature shift. We aren’t cooling boiling wort down to pitching temps…just warming it up a bit. If my math, and understanding of the heat transfer capacity of copper is correct, we should be fine. If not…more can always be added. This is just a prototype after all.
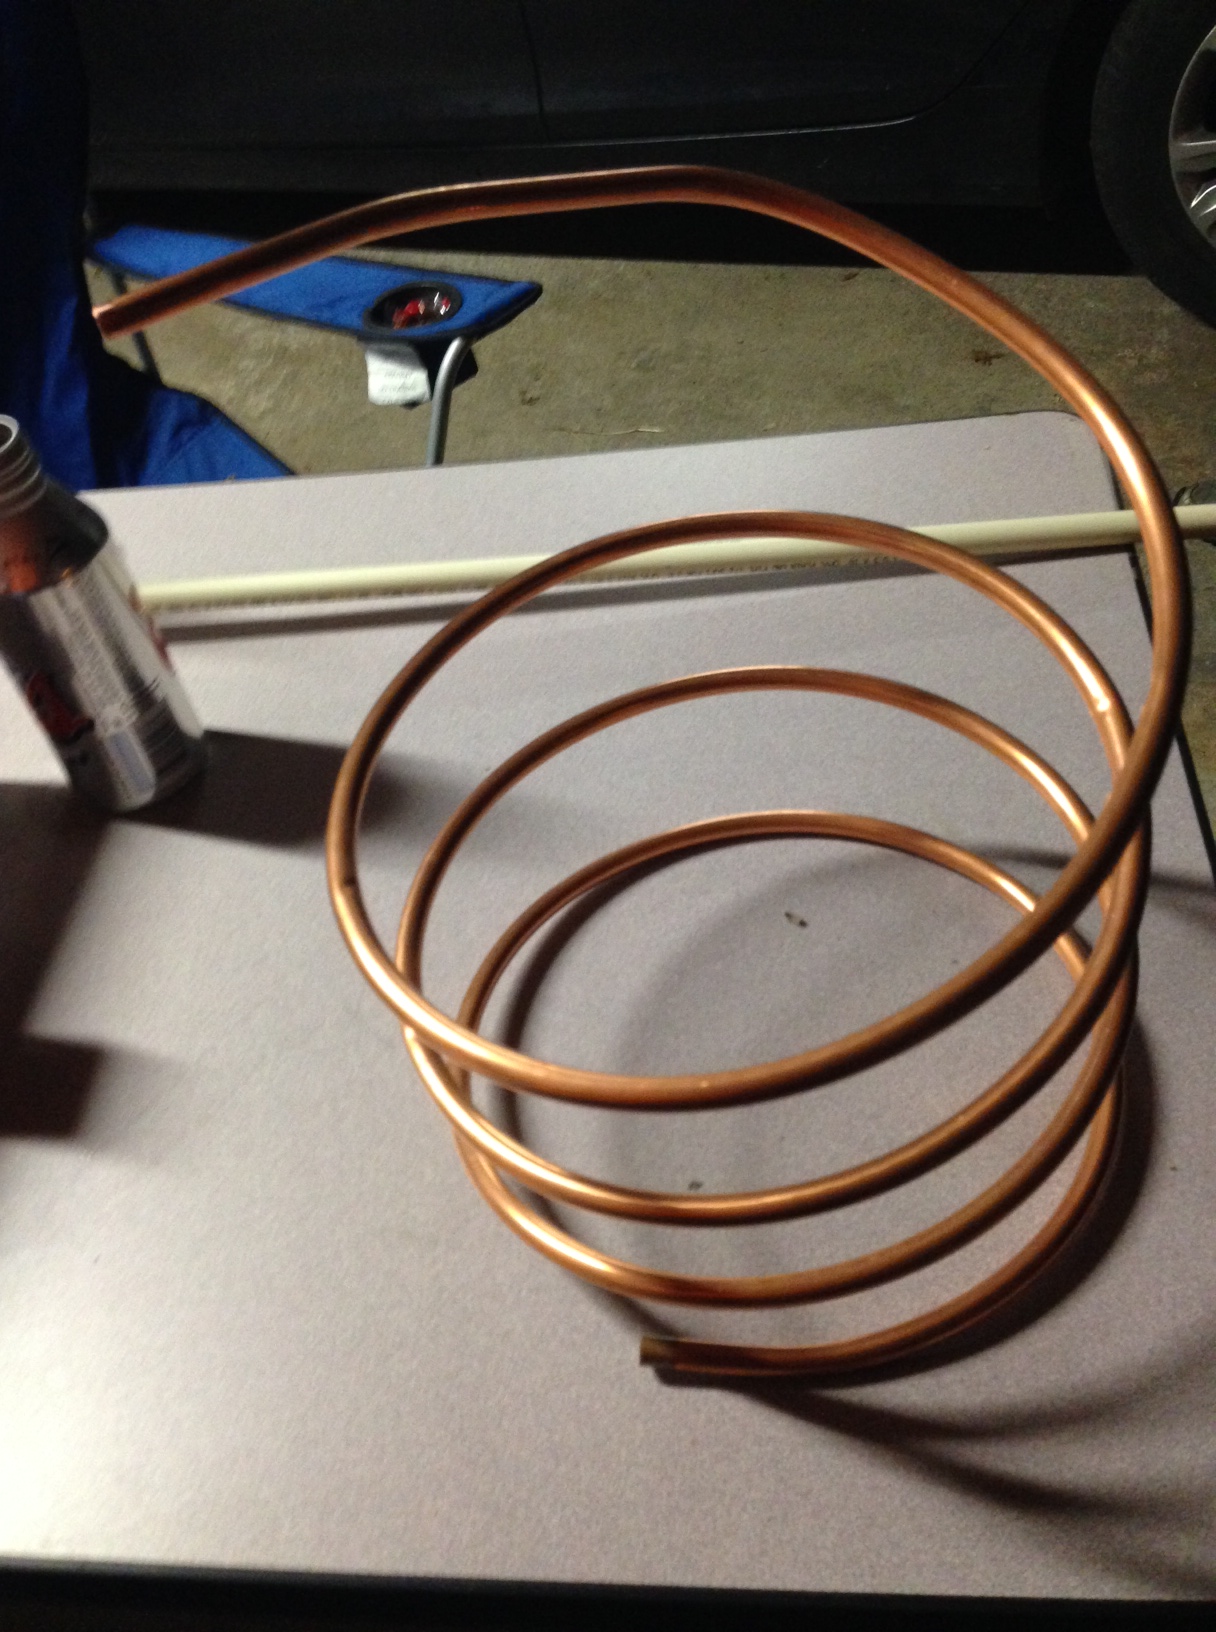
We then quickly realized that we needed to bend one of them in the opposite direction to make our idea work. Below you can see the two intermingled together. The one on the right is the one that we had to rebend. Not as pretty, but not too shabby for a prototype that was conceived just nights prior while sipping tall boys in front of a gas station after a hockey game. 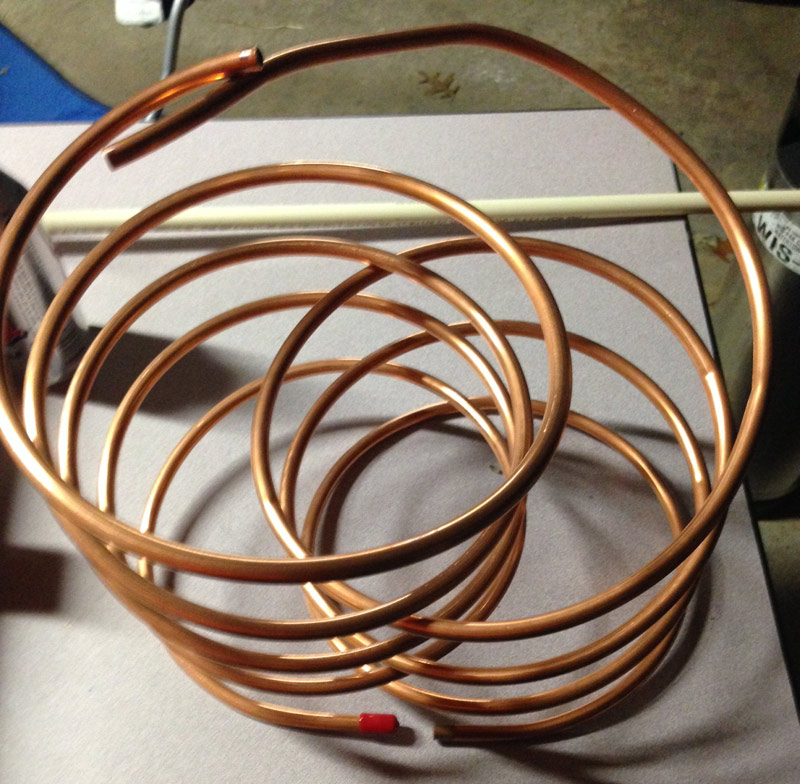
Next we needed a way to connect everything together. We connected our coiled tubes to 1/2″ tees using compression fittings, and attached the tees to lengths of 1/2″ ID CPVC.
Here’s the final prototype. Liquid comes in through a 1/2″ tube. Splits into two 3/8″ tubes. Spins around a bit, and merges back together before making an exit out another 1/2″ tube.
We haven’t used it in a brew yet, but early flow tests have been very good. No real drop off in volume was noticeable when going through this contraption.
Once we have had the chance to try this out a few times in actual brewing action, and are certain it will work as we hope it will, we will permanently install it into the HLT and do away with the CPVC in and out tubes.
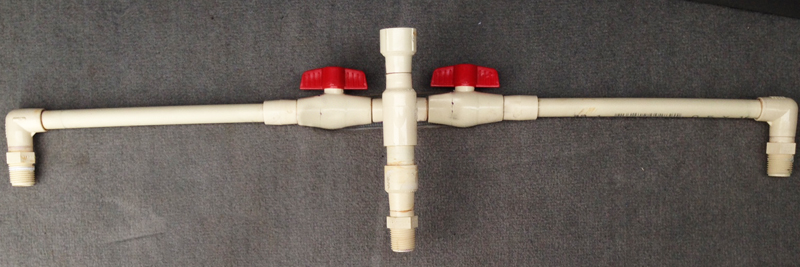
Our final change in the pursuit of better flow was a slight modification to our Thermal Interchange Manifold…and by slight modification, I mean complete rebuild.
Previously we had used 1/2″ tubing for the entire build…but we had failed to take into consideration the amount of space the thermowell would take up in the middle of the central down tube.
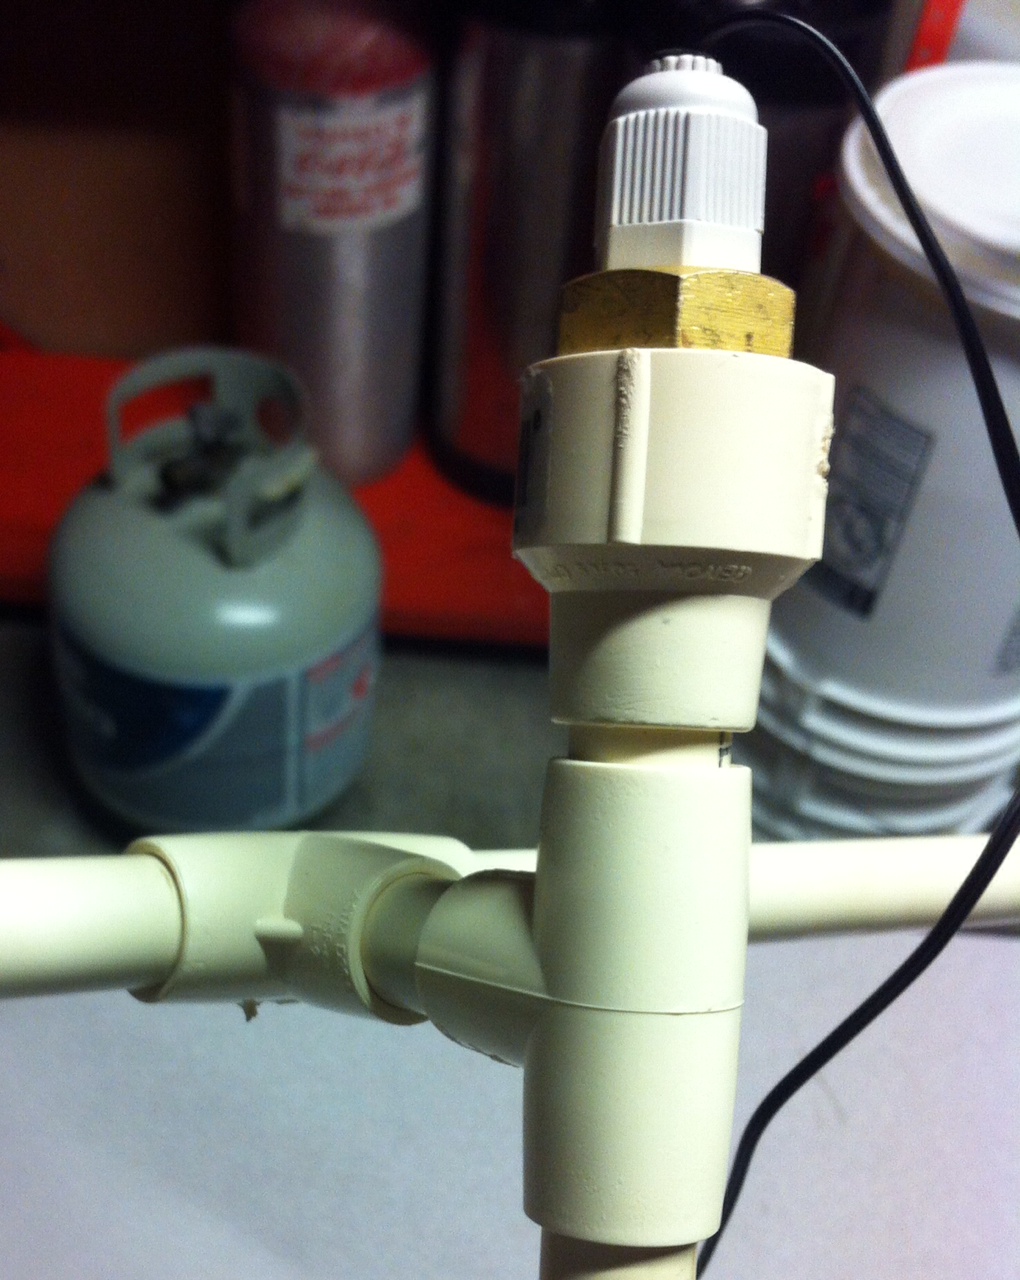
The tube was again choking off our flow, as only about 1/8″ of space was left on any side of it within the tubing. The solution again, was fairly simple…we needed to make the down tube bigger.
We couldn’t take the old one apart, since it had been solvent welded together…so TIM 3.0 had to be constructed from scratch. Thankfully, I always keep plenty of cpvc parts on hand, so this wasn’t too tall of a task, other than having to buy a 10 foot length of 3/4″ cpvc when we only needed about 3 inches in the end. But so it goes. I’m sure the $6 investment will be worth it.
The built anew TIM is still primarily constructed of 1/2″ ID tubing but features a 3/4″ central down tube which is capable of accommodating the thermowell without interrupting flow. The increased inside diameter more than compensates for any obstruction created by the thermowell. Great results are now expected.
That’s all I got for now. Thanks for bearing with all the nerdery.
We’ll let you know how all this works once it is put into action.
