
Over the course of the last two years, you have had the chance to get to know the three of us behind Regular Guy Brewing. Between our posts and tweets, avid visitors have probably been able to glean quite a bit of insight into who Justin, Brian and I are as brewers and individuals.
Well now we have a new member of the team that I would like to introduce.
Some call him…TIM.

Or, if you prefer to go by full names: Thermal Interchange Manifold
TIM is the latest and greatest enhancement to our HERMS system, and should…if my theories prove correct…provide us with an even more effective mash than we have had in the past. While our mashes haven’t been too shabby up to this point, typically clocking in at around 84% efficiency, there is always room for improvement.
And while we are still in the homebrewing leg of our saga, I see no reason not to do some tinkering here and there. Not like anyone ever needed to give me an excuse anyways.
If you want to know more about the thought process behind the construction of TIM, I suggest you catch up with my post from last Friday. I think you will find it to be a mind-numbingly boring…but ultimately pseudo-informative read.
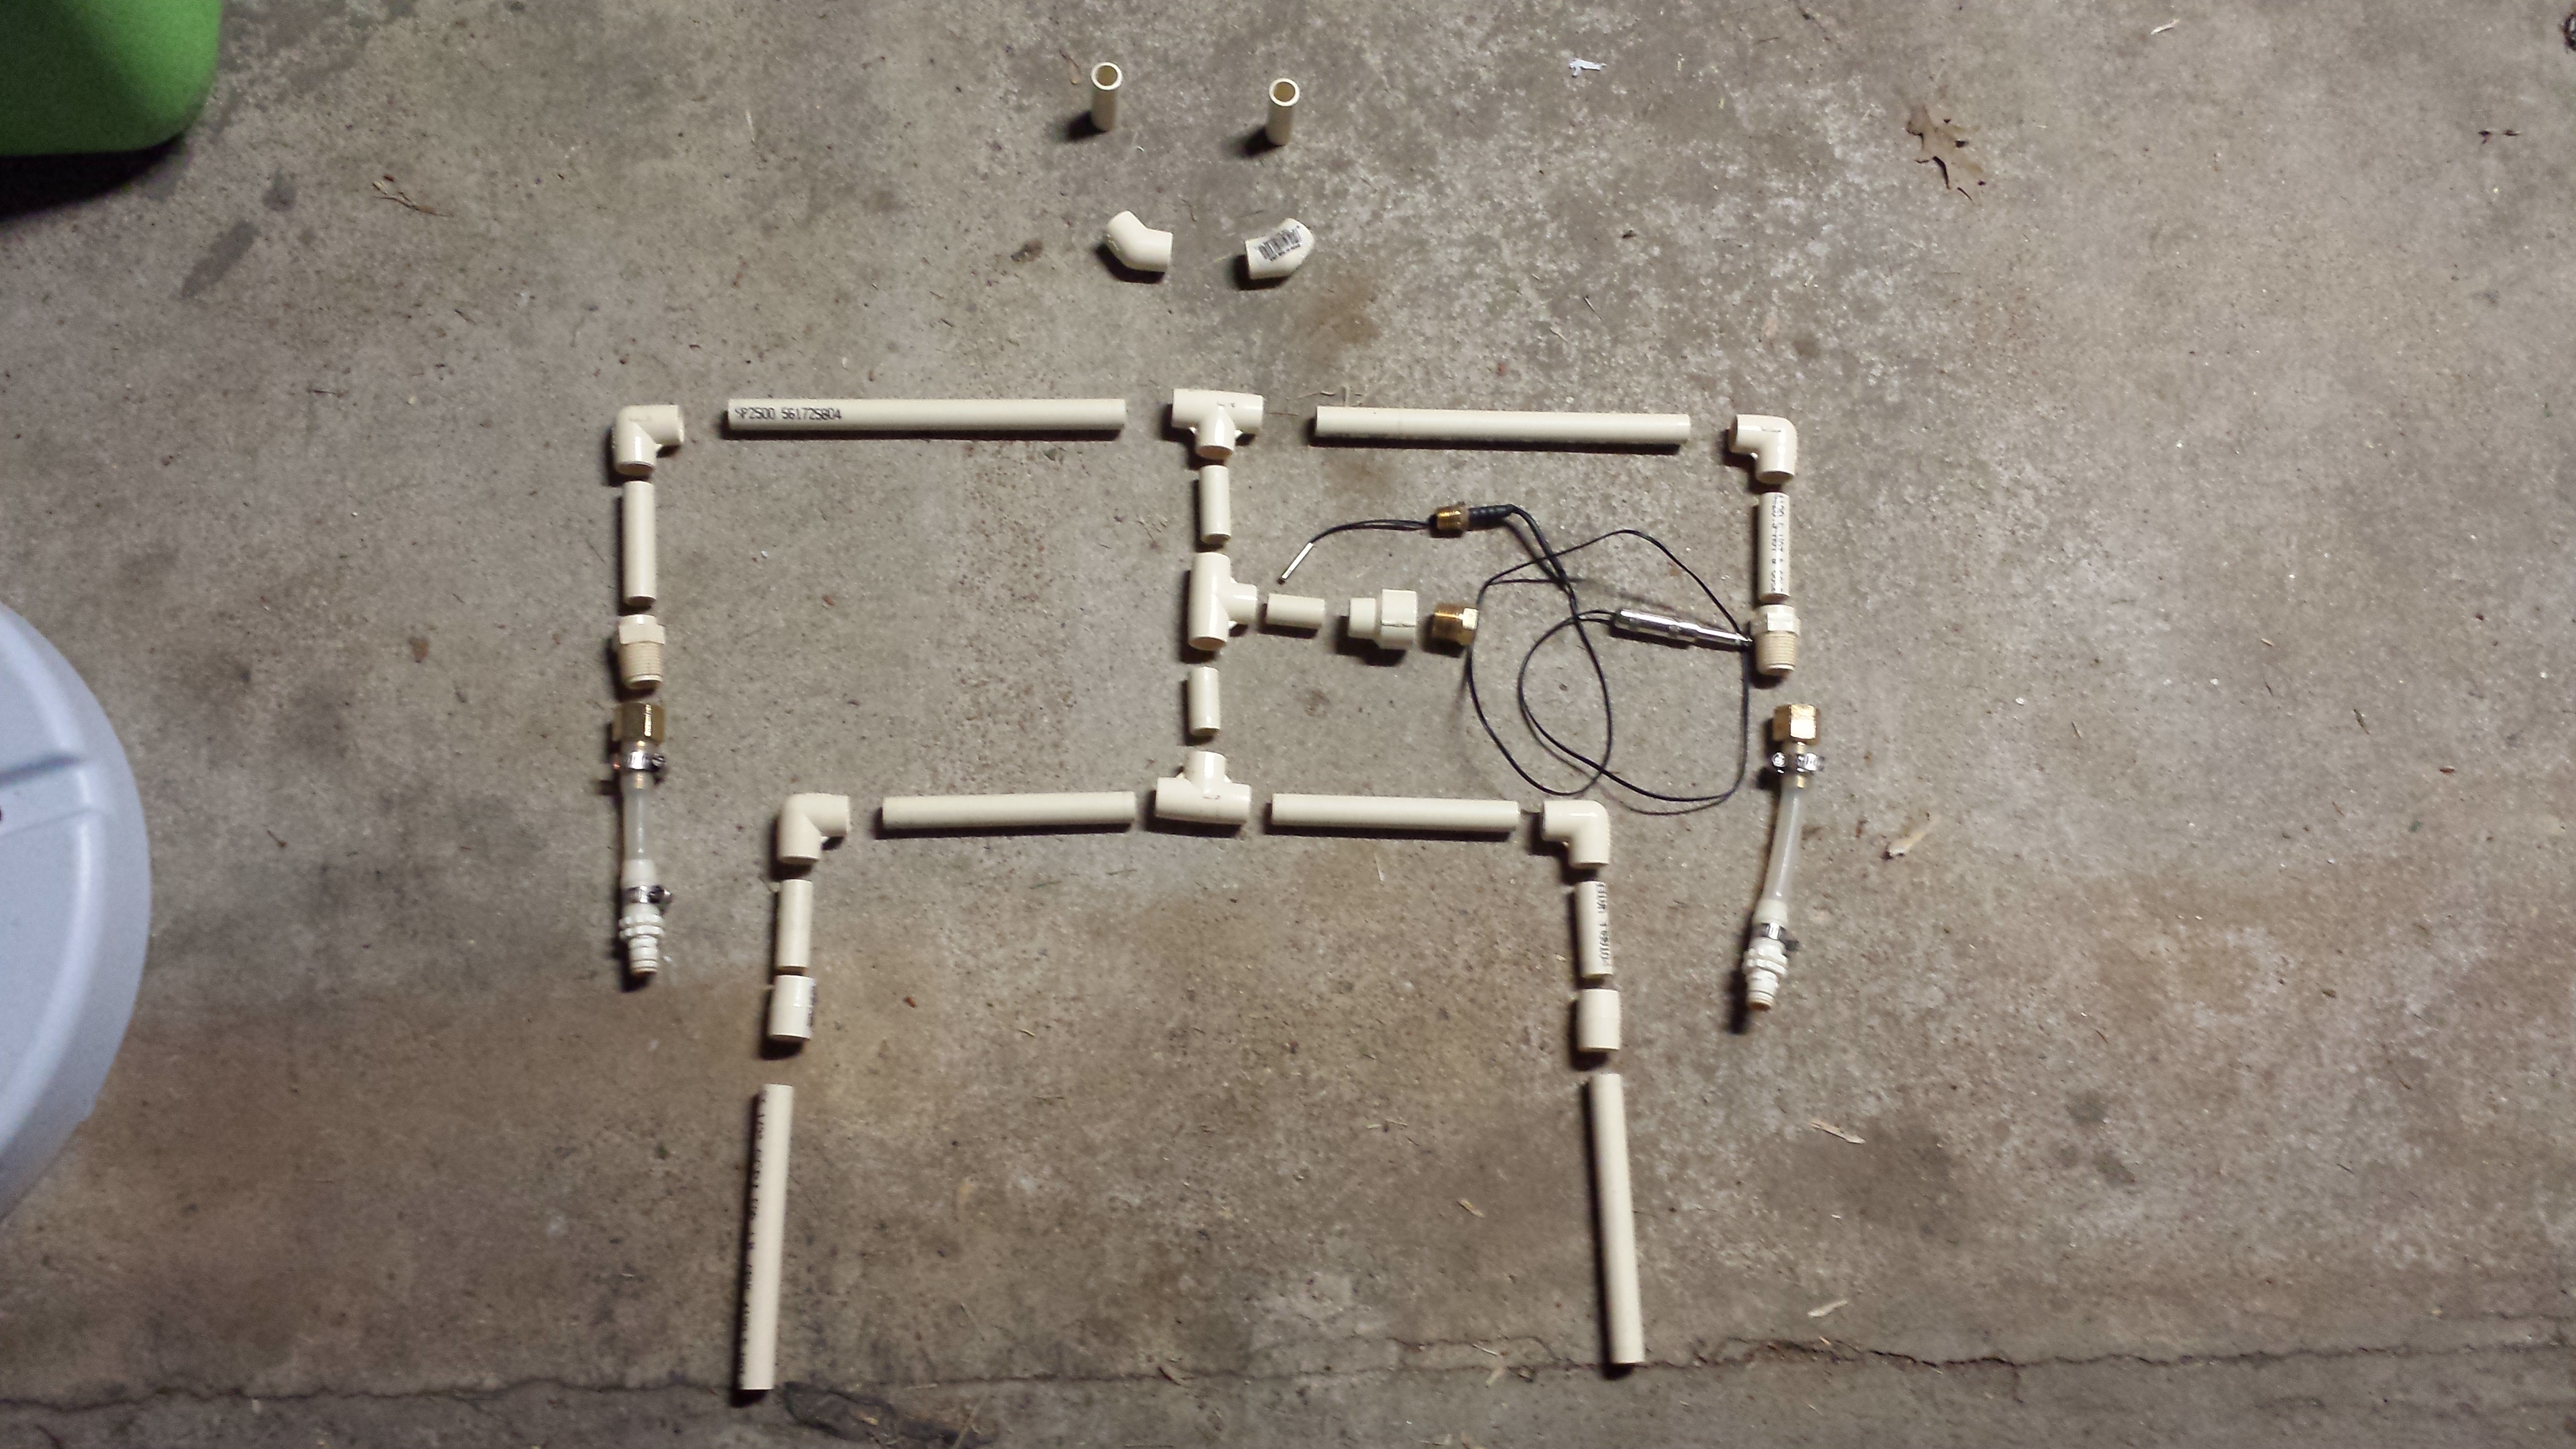
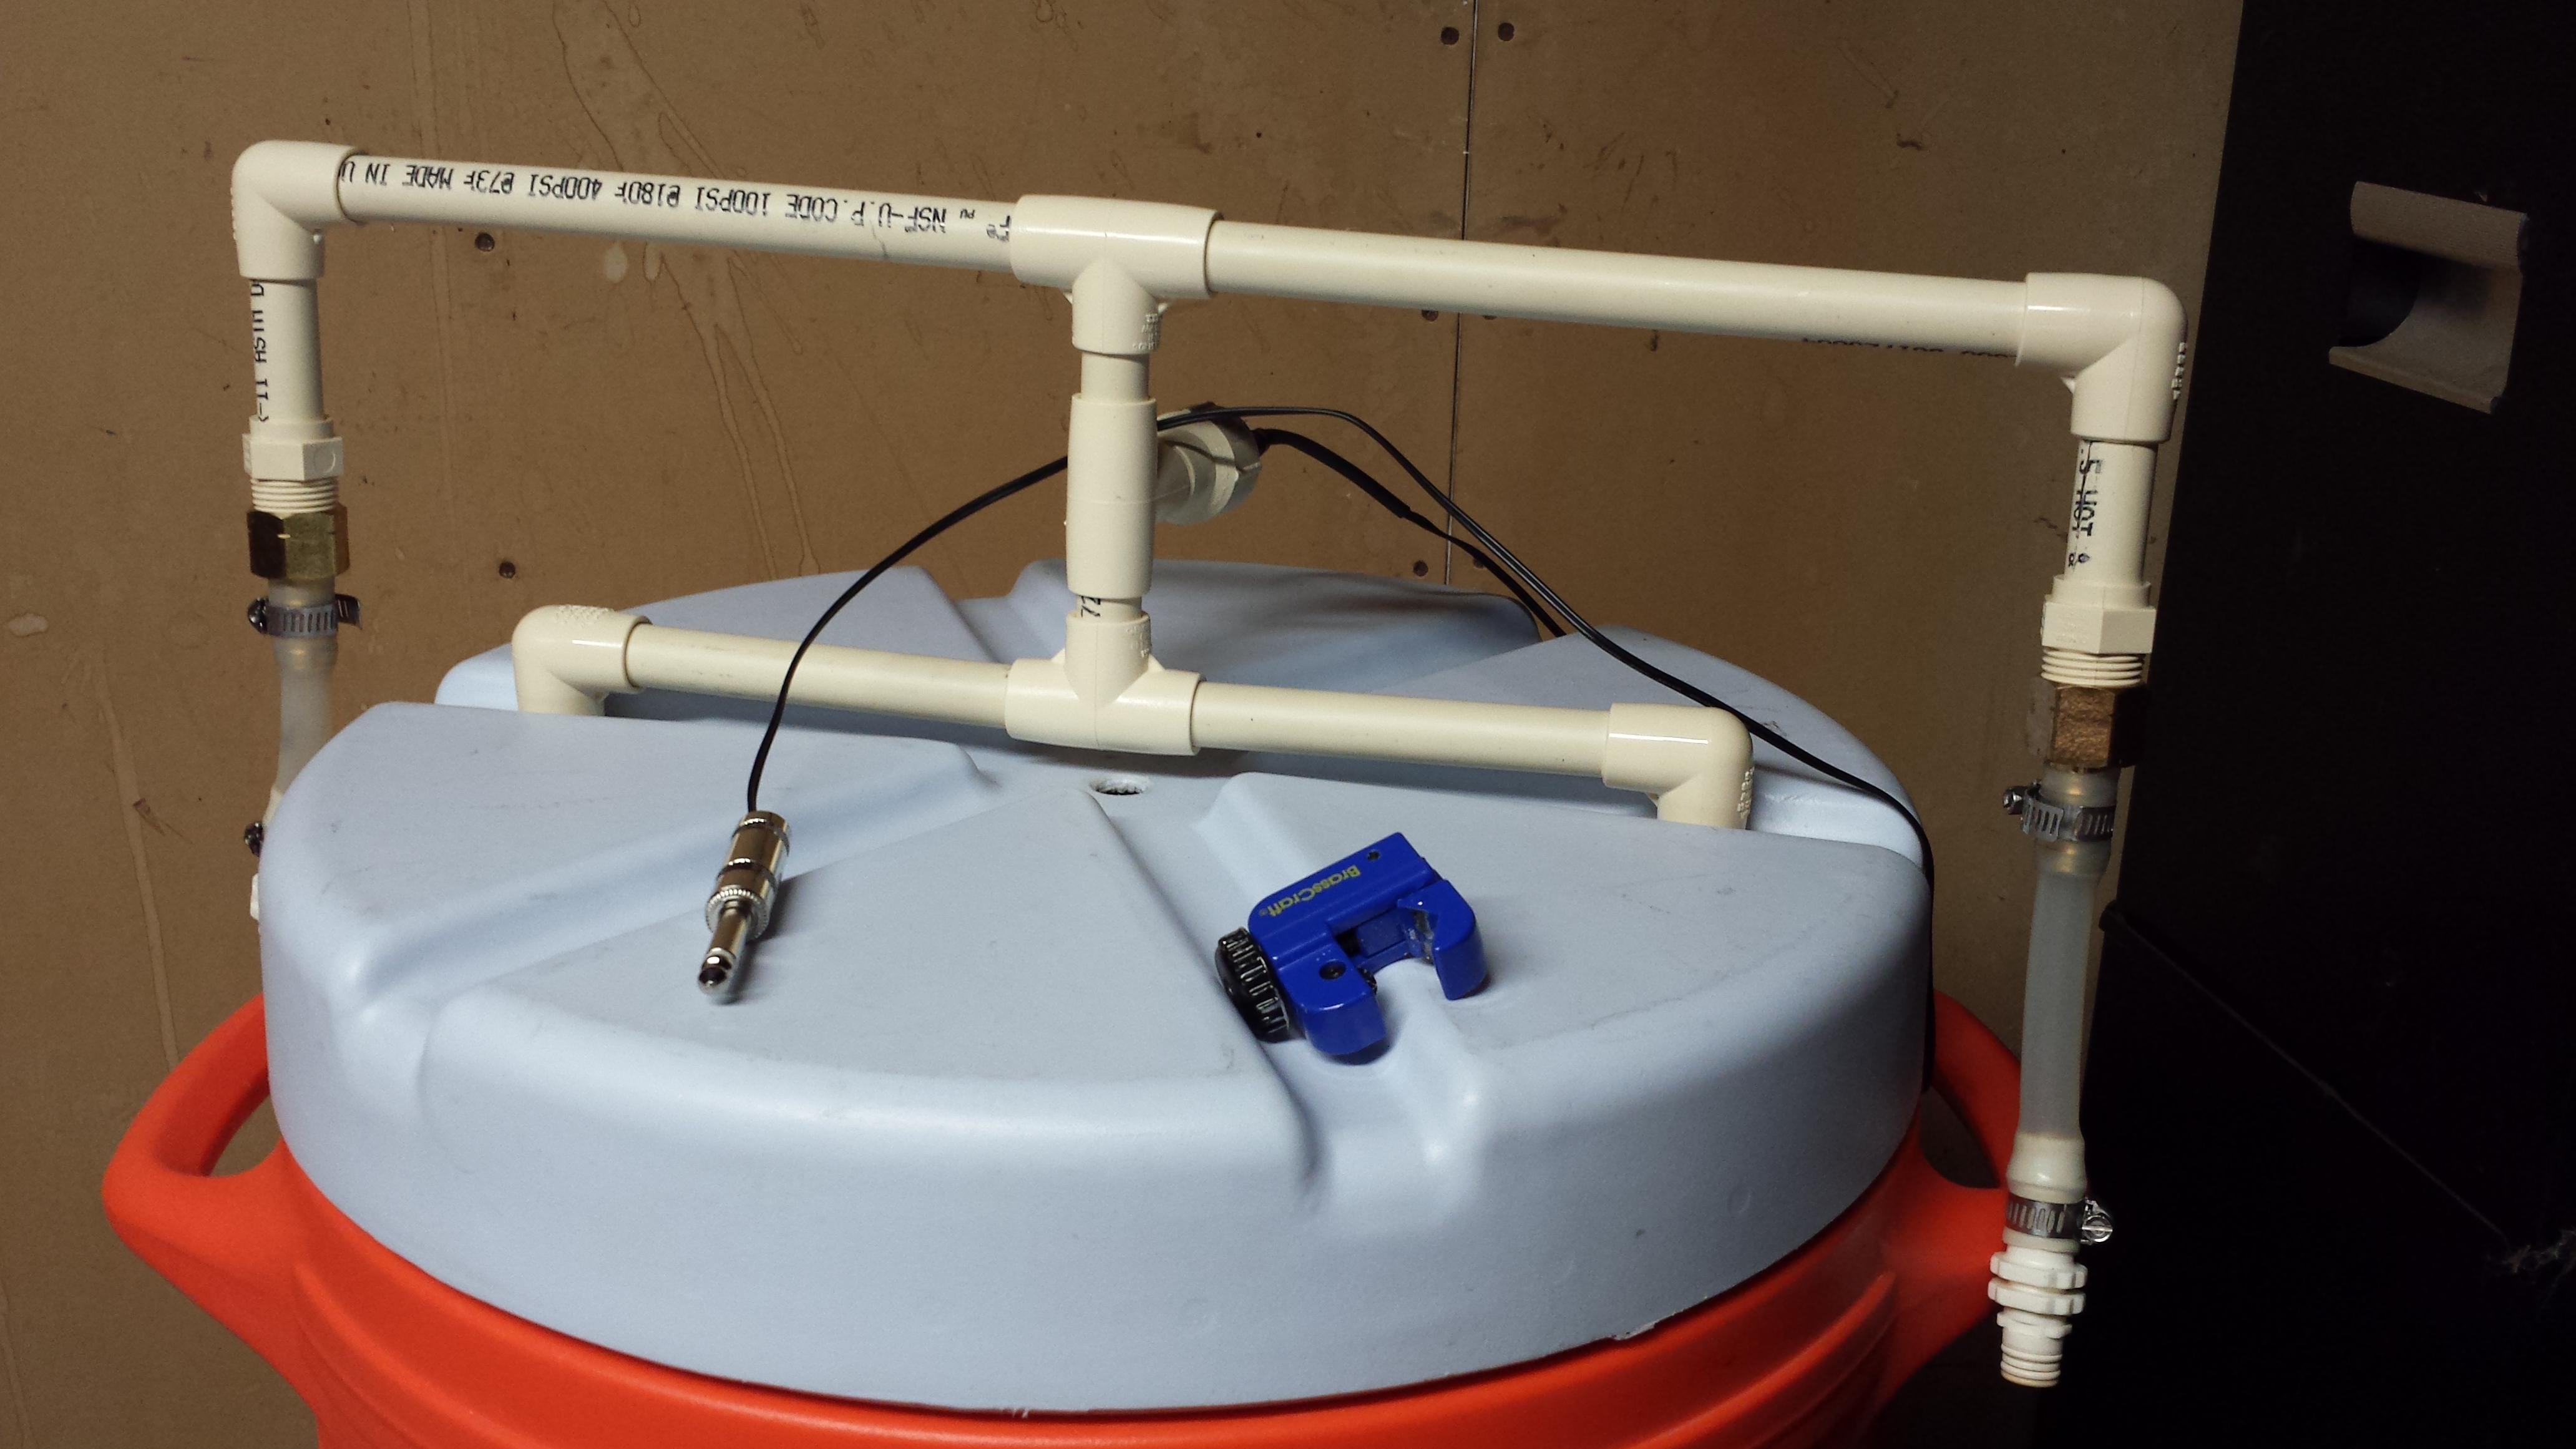
At any rate, here is the general breakdown of our construction. This manifold was constructed out of 1/2″ cpvc tubing. I know…I know. It’s not stainless. Nor is it copper. How gauche.
While we over here at Regular Guy Brewing may be many things…material snobs we most certainly are not.
While it may not be sexy…cpvc does a pretty good job at this kind of thing. It is designed to withstand temperatures far beyond standard mash and sparge temps, is food safe, and is pretty easy to work with. Beyond that, plastic is a super crappy temperature conductor so we won’t lose nearly as much heat using cpvc as we would with metal. Plus…it’s dirt frickin’ cheap.
That said, If TIM does a good job, we may upgrade to insulated copper when we build TIM 2…but for now cpvc will suffice quite nicely.
Here’s the exploded view of the parts:
And here is a zoomed in shot of the temperature probe assembly
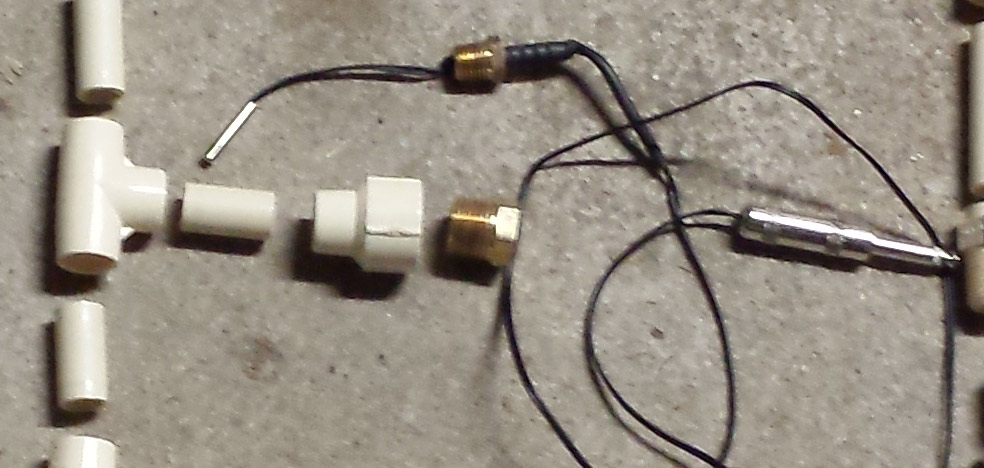
Our temperature probe goes inside the manifold and will send instant readings to our control module. To prevent hot wort from leaking out of the probe port, we ran the wire through a 1/4″ NPT fitting with a 1/4″ barb and then shrink wrapped it all together so it is a nice tight fit. That 1/4″ fitting connects to a 1/4″ to 1/2″ bushing, which then attaches to the cpvc t via an adapter. The temperature controller (sorry no pic to show you) will then control whether wort flows via a simple recirculation through the TIM or whether it first passes through a heat exchanger in the hot liquor tank.
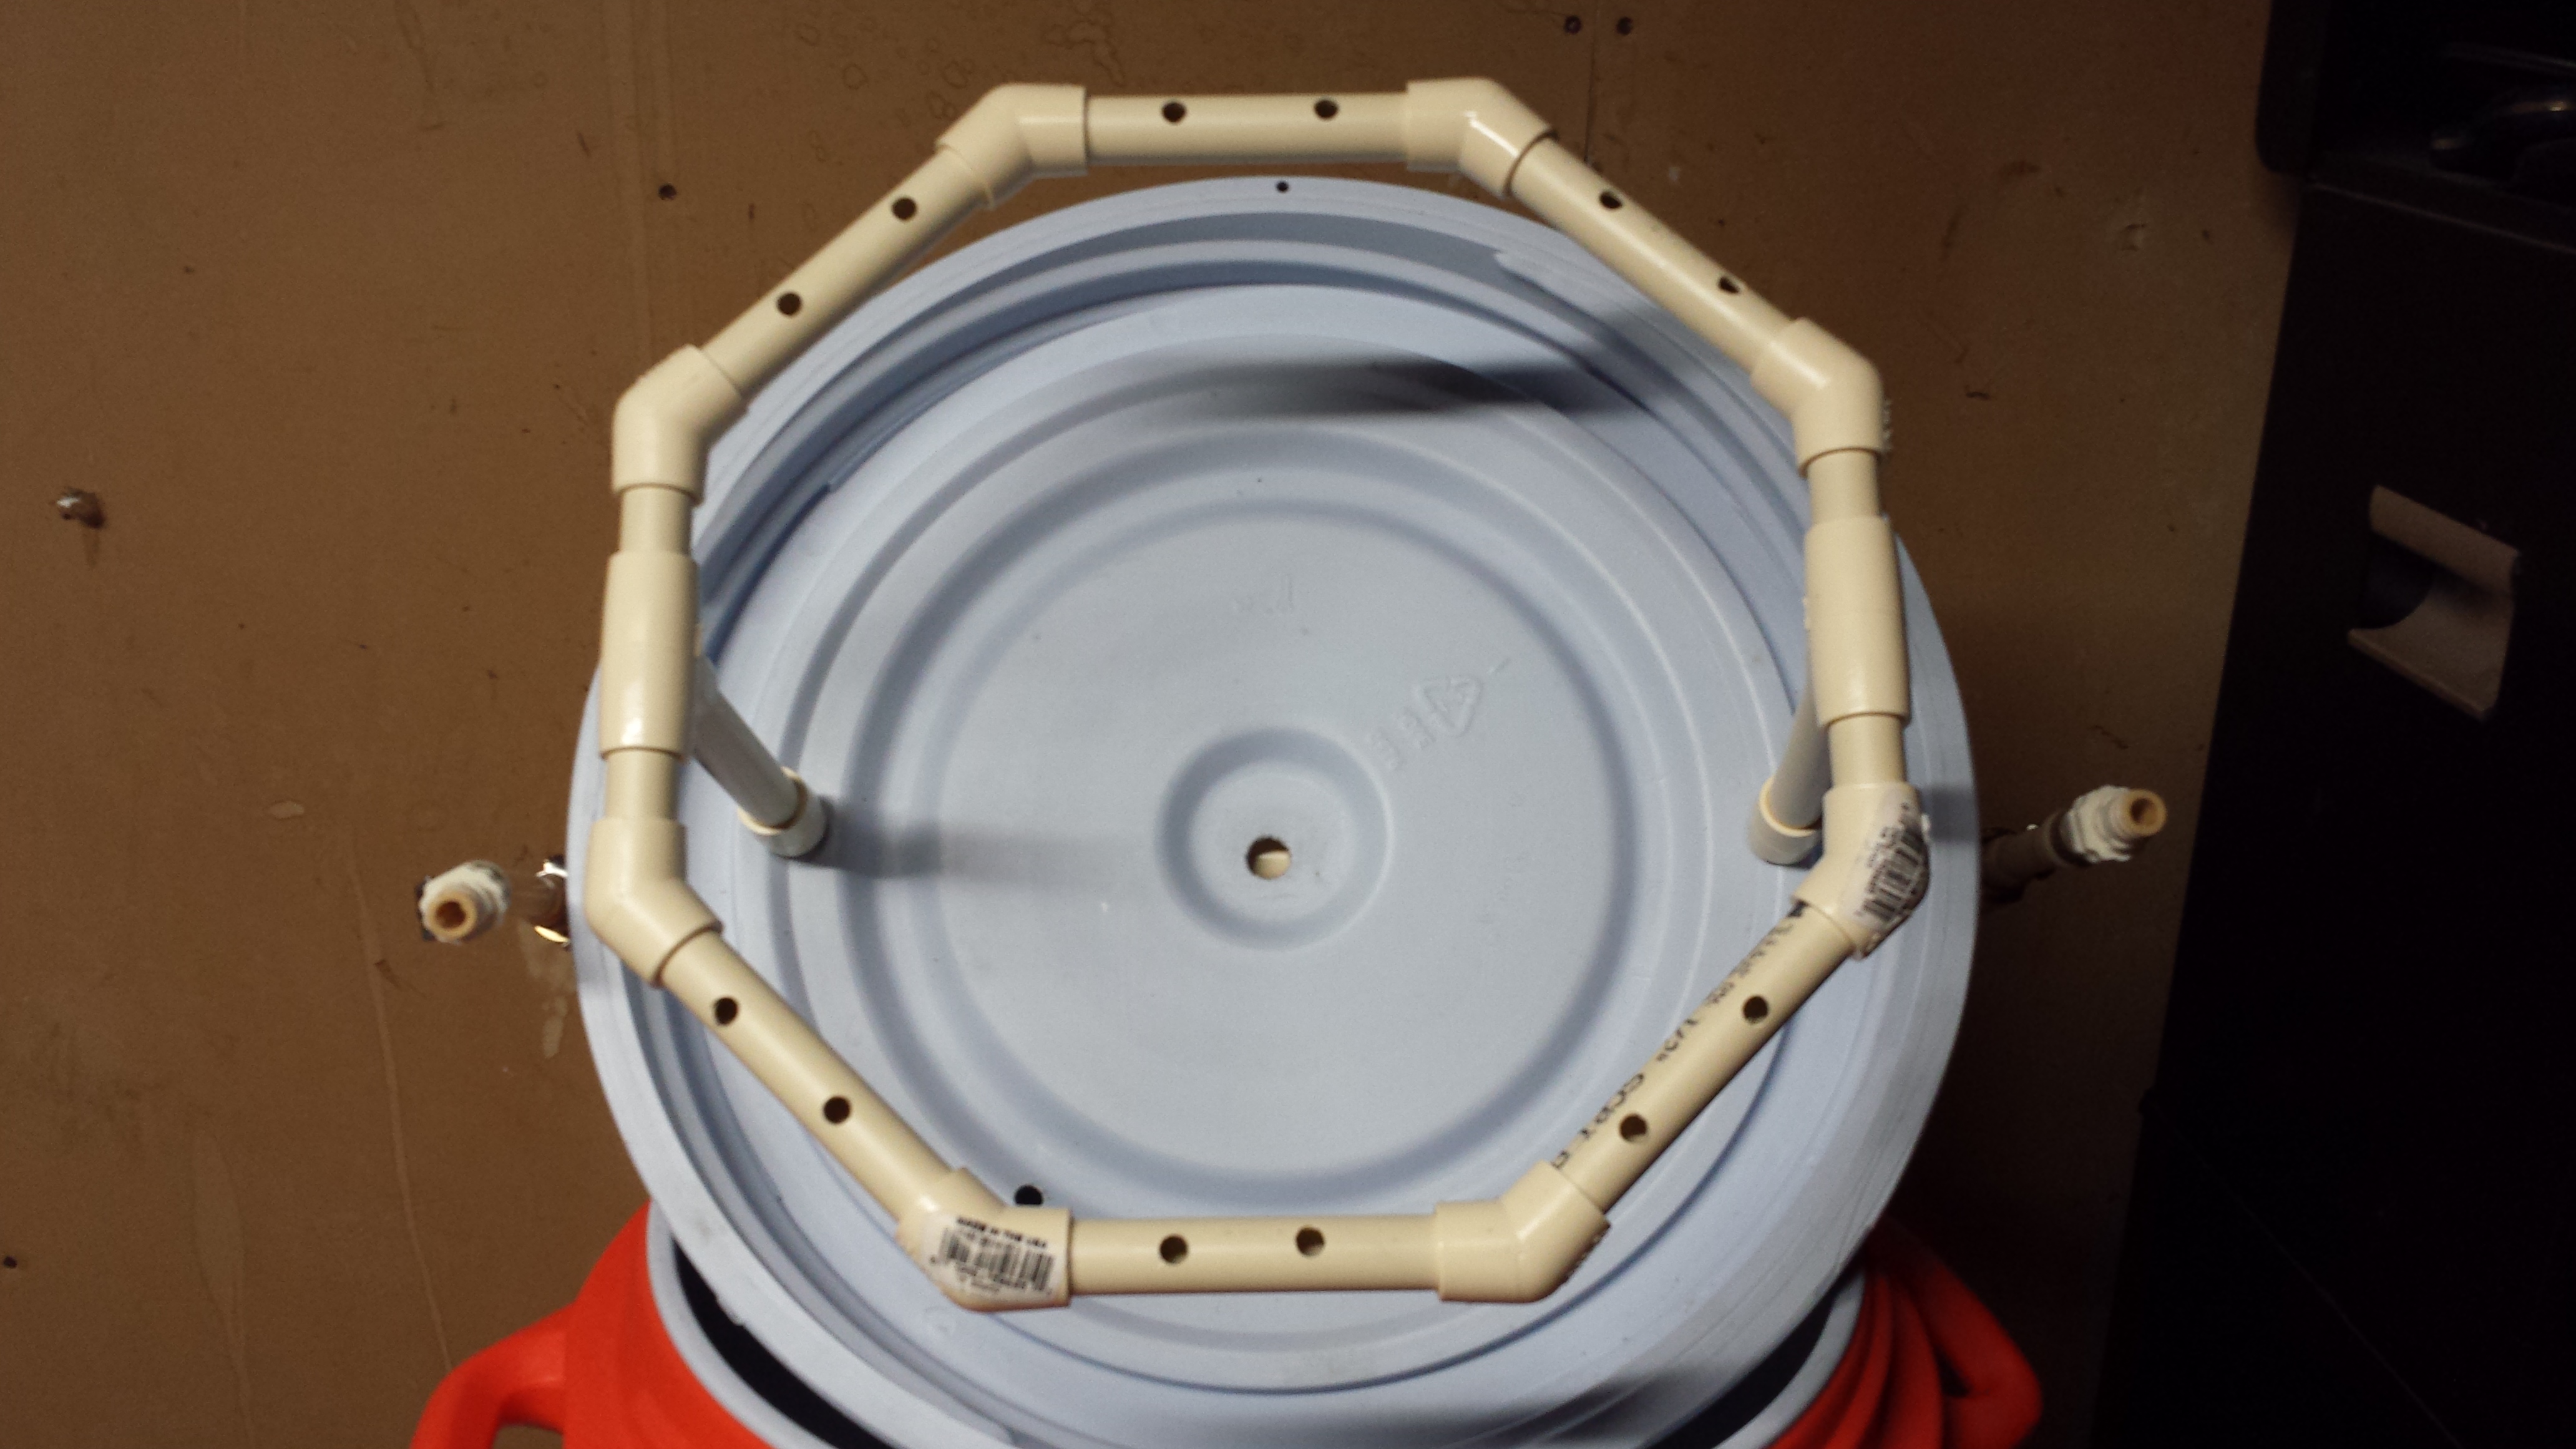
Once the wort passes through the top portion or the TIM it will be sprinkled down on the grain bed through this octagonal ring which Brian constructed:
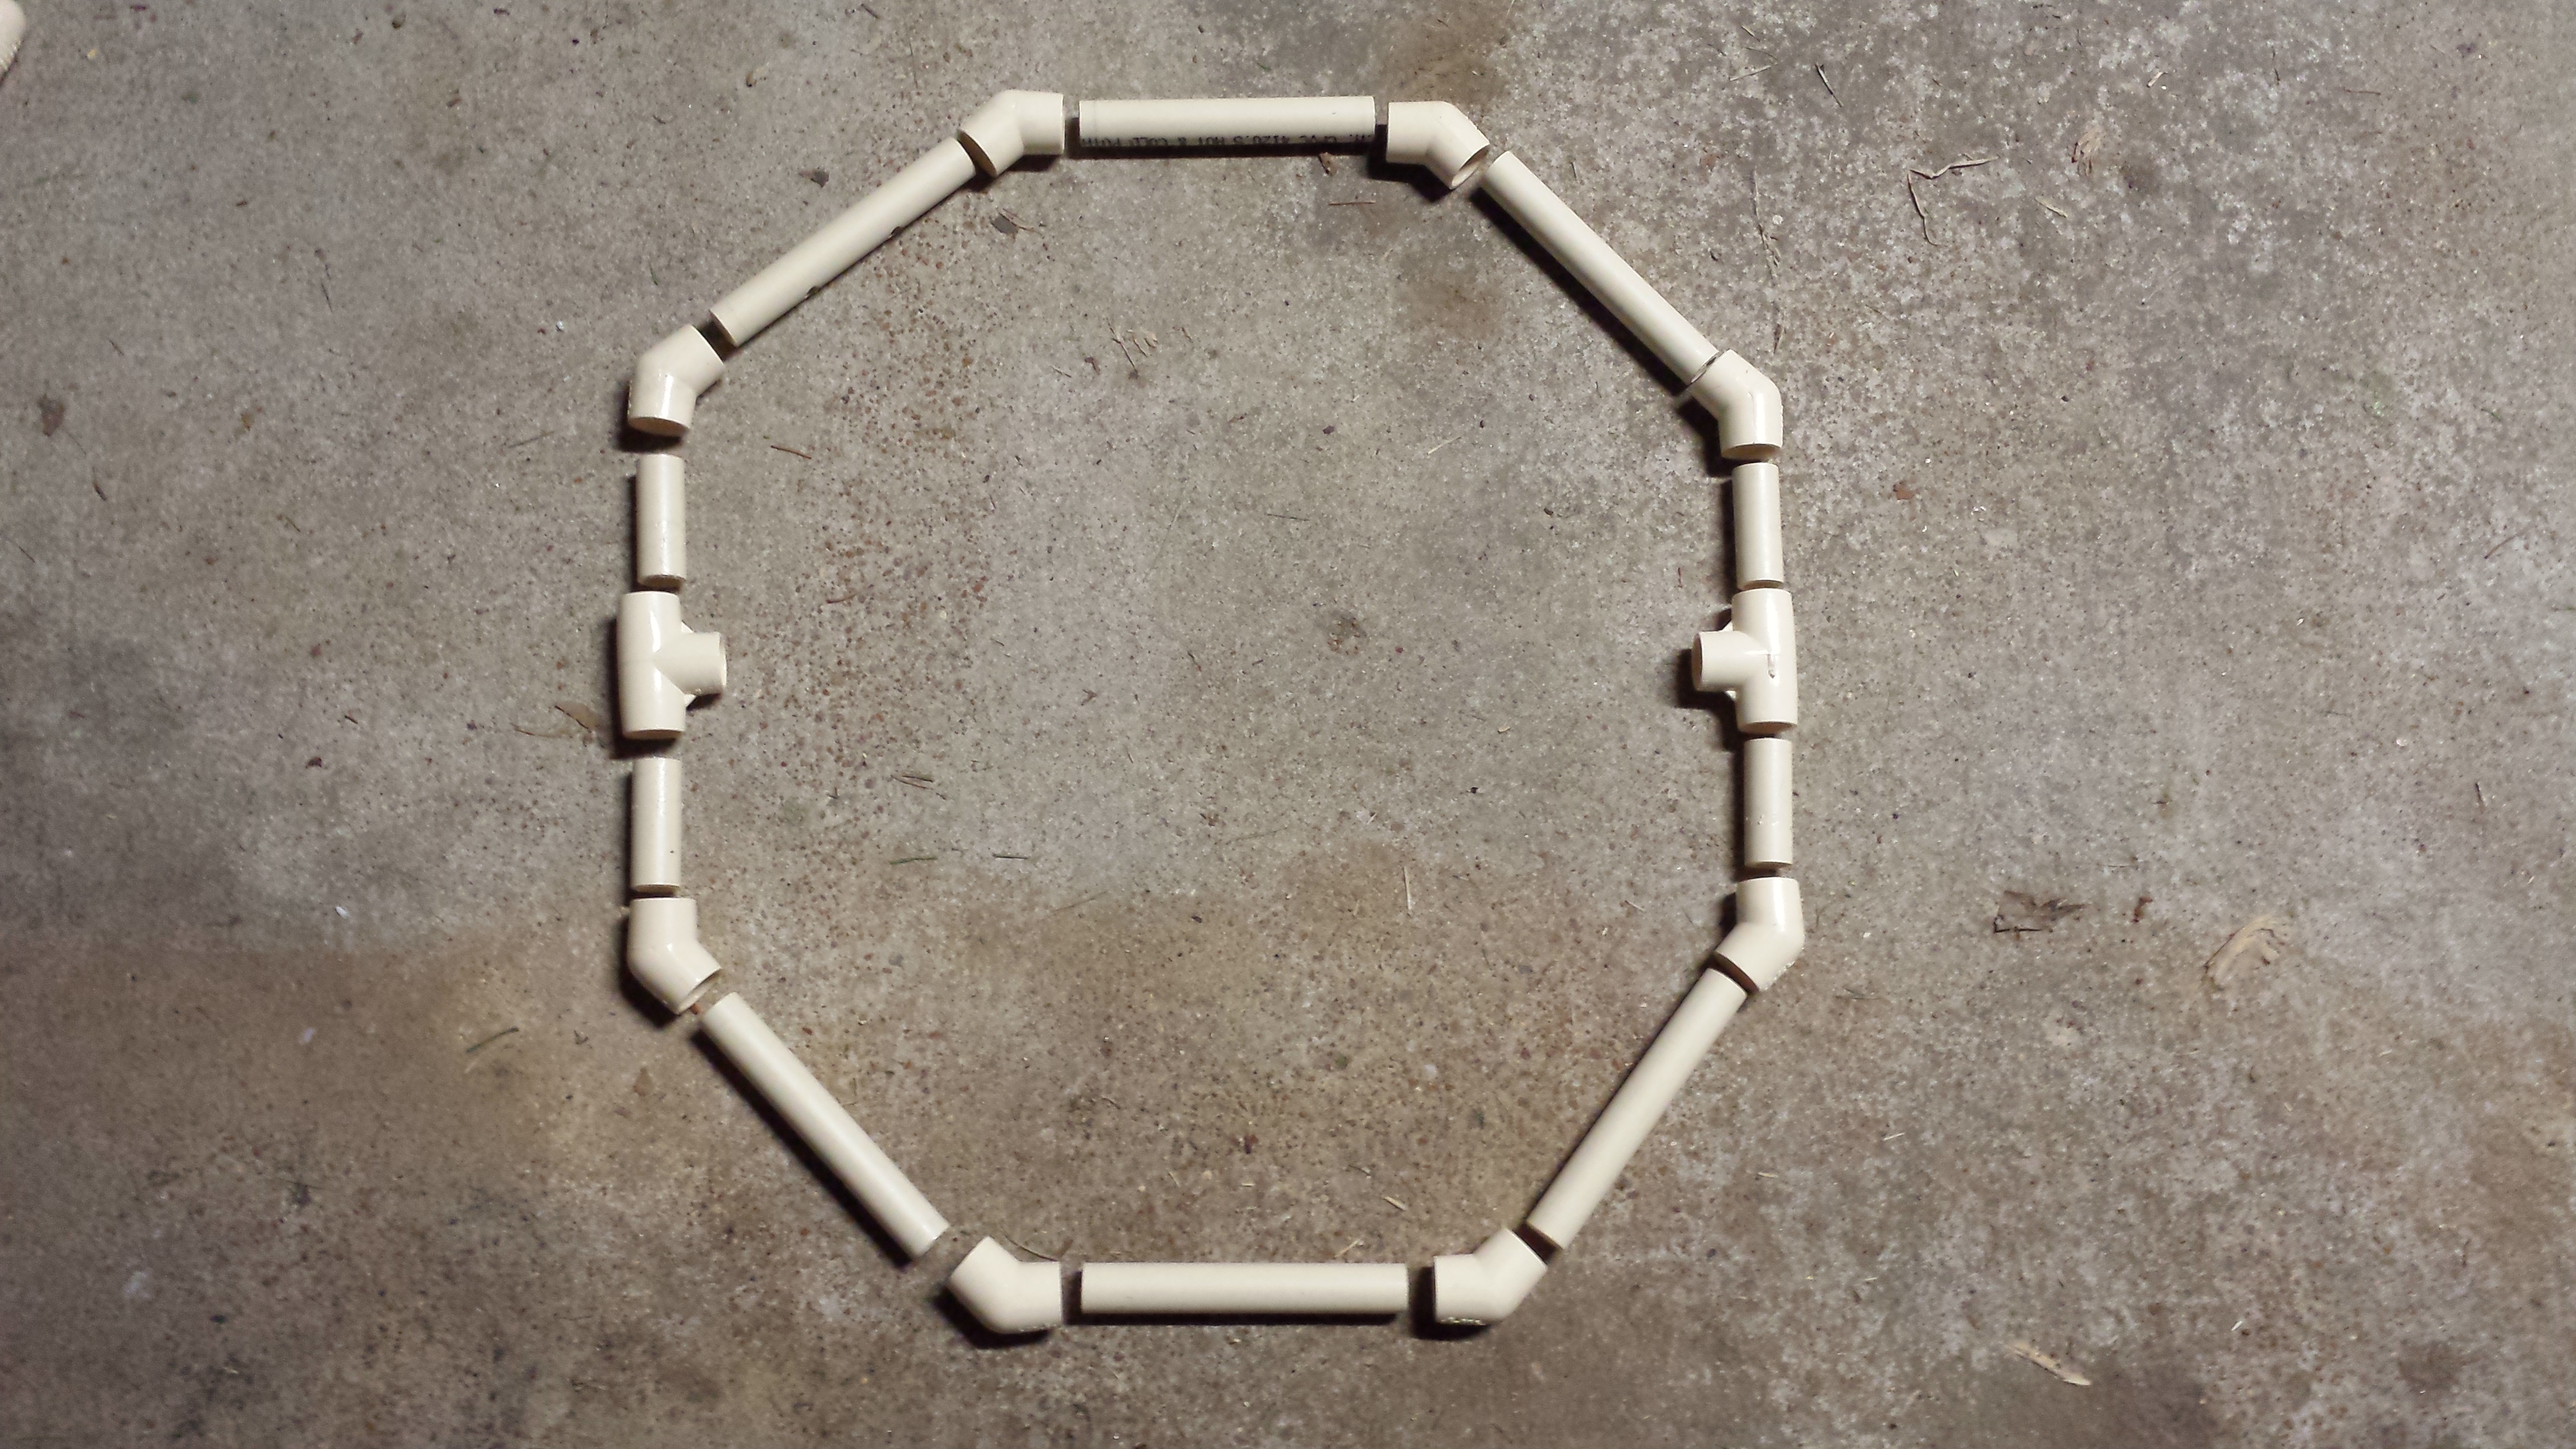
And since I know how much people love exploded views, here it is again…just prior to assembly:
And here’s another shot from the top…just for good measure:
At this point nothing has been glued. We may change that, but for easier cleaning I chose to construct TIM in a way that would break down easily. Sweat fittings have worked just fine with our previous cpvc projects, and I am keeping my fingers crossed that such is the case with this project. We will just have to keep our typical Friday night wrestling matches a bit farther away from the mash tun than usual.
Glue can always be applied before our next brew if the sweat fittings fail to hold. Otherwise…there’s always duct tape.
We will be putting TIM to work tonight with the brewing of another batch of our Hot Blonde. We are going to be taking some of the feedback we received from the judges at the St. Louis Micro Fest last month, along with our recent beer outings, to heart and see if we can make an already good beer even better with a few process and recipe tweaks.
Should be a good time!
We’ll be sure to let you know how it turns out next time!
Til then…keep up the good work!

Pingback: Tweaks and Mods | Regular Guy Brewing
Pingback: Getting in the flow of things… | Regular Guy Brewing